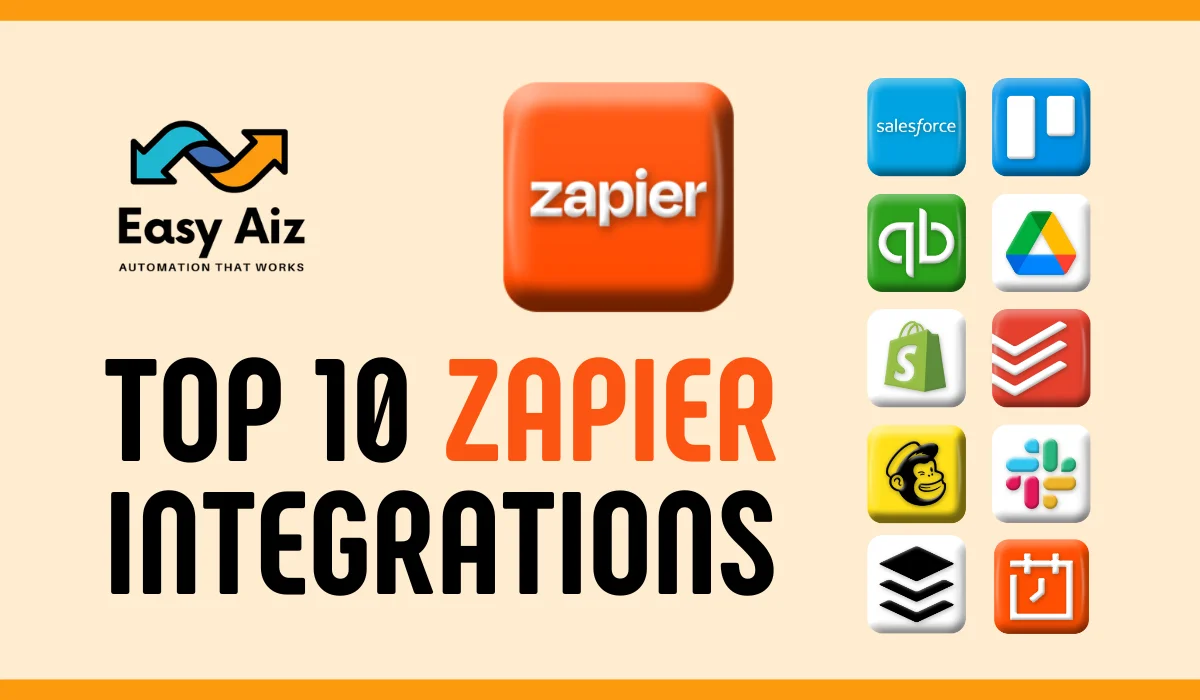
List of Top 10 Zapier Integration
Key Takeaways
- Zapier integrates your favourite tools, automating repetitive tasks and saving you time, regardless of your automation experience.
- Explore how Zapier’s multi-step Zaps and filters simplify complex workflows, allowing for straightforward automation based on your needs.
- Learn integrations like Salesforce CRM, Shopify e-commerce, Mailchimp email marketing, Google Drive file management, and more to optimize various aspects of your business.
Zapier connects your favourite tools and applications quickly, making it a beacon of automation in a world where quickness and efficiency are fundamental. Knowing the vast number of Zapier integrations transforms how you work, regardless of how experienced you are with automation or how new you are. Let’s learn about the limitless possibilities that await.
What is Zapier?
Zapier is a powerful tool that simplifies tasks and enhances efficiency through seamless integration. At its core, Zapier is an automation platform that helps everyone connect with their favourite apps and services, allowing a productive relationship without personal involvement.
Why does Zapier Integration matter?
Zapier integrations are about boosting your productivity and teamwork rather than simply linking apps. Picture a world where all your tools are in perfect balance, sharing information without difficulty and saving you hours of work while doing routine tasks. That is Zapier’s magic.
Benefits of Zapier Integration:
Zapier is a useful application that automates repetitive processes, saving you time. It creates a connection between your favourite applications, enabling seamless integration. Features like filters and multi-step Zaps make it simple to automate complex operations. Whether you’re a large enterprise or an individual, it grows with you.
Zapier guarantees accuracy by minimizing mistakes in data transmission between applications. It is adaptable, compatible with many applications, and reduces labor costs by minimizing manual labor. It also provides real-time alerts to keep you informed, which makes it a helpful partner for cooperation and productivity. One of the main benefits of Zapier integrations is their incredible productivity boost.
For example, by combining communication apps and project management tools, you can create a seamless system where tasks flow from creation to execution with ease. You can automate repetitive tasks to concentrate on the important things in life, and calendar and to-do list connections guarantee you never miss a deadline.
Top 10 Zapier Integrations:
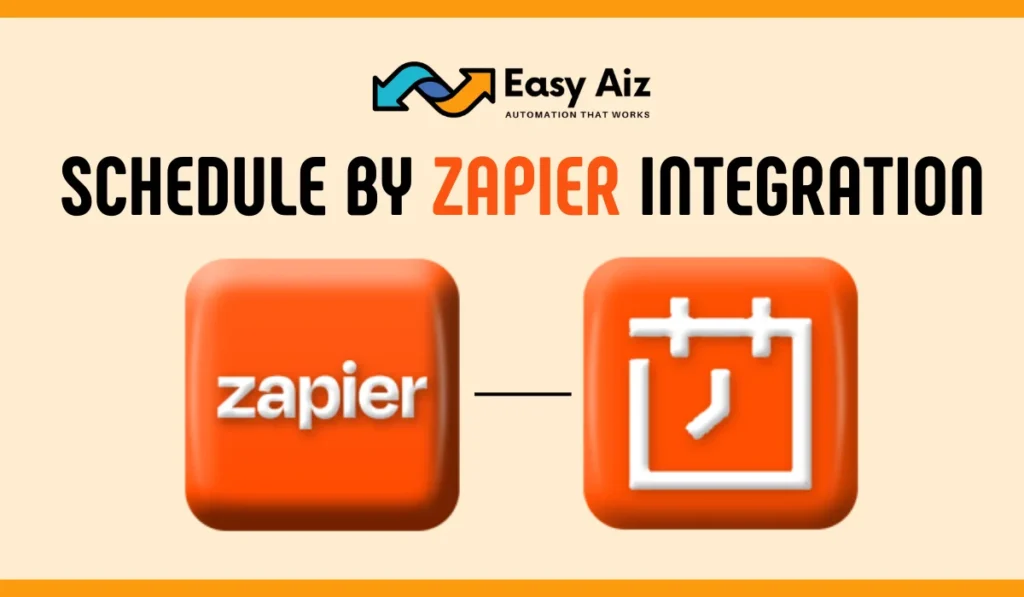
Schedule by Zapier Integration:
You can simplify and optimize various business processes in this category. It includes automating repetitive tasks, triggering actions based on a specific time, and creating custom workflows to enhance efficiency. Zapier itself can be used to automate various tasks by creating workflows that connect different apps and trigger actions based on specified conditions.
Integration Process:
Let’s create a Zap that uses Schedule by Zapier to trigger a scheduled event and then connects and customizes Slack for a specific action. This example takes you to have accounts set up on Zapier and Slack:
Log in to Zapier:
- Open Zapier and log in to your account.
Create a New Zap:
- Click the “+ Click” button in the Zapier dashboard to create a new Zap.
Set up the Trigger (Schedule by Zapier):
- Choose “Schedule by Zapier” as the Trigger App.
- Select the trigger event “Custom.”
Schedule Set Up:
- Configure the schedule based on your preferences. For example, set it to trigger every day at a specific time.
Set up the Action (Slack):
- Choose “Slack” as the Action App.
- Select the action event you want, such as “Send Channel Message.”
Connect Slack Account:
- Connect your Slack account to Zapier and choose the Slack workspace and channel where you want to send the message.
Map Slack Message Fields:
- Map the relevant fields in Slack (e.g., Channel, Message Text) to customize the message.
Test the Action:
- Test the Slack action to ensure a message is sent to the specified Slack channel.
Turn On the Zap:
- Once you’ve set up and tested the Schedule and Slack actions, turn on the Zap to make it live.
Now, this Zap will trigger a scheduled period using Schedule by Zapier at the specified time and send a customized message to a Slack channel. This workflow is useful for automating routine messages or notifications on a schedule, helping you keep your team informed and organized.
Salesforce Integration (CRM)
This integration allows you to automate customer-related tasks such as lead management, contact updates, and communication tracking. It ensures that your customer information is always up-to-date and that you can easily manage and nurture your relationships. Salesforce is a widely used CRM platform that can be integrated with Zapier to automate tasks like updating customer records, creating new leads, and sending notifications based on customer interactions.
Integration process
Let’s create a Zap that connects Gravity Forms, a WordPress form plugin, with Salesforce to create leads whenever a new form submission is received automatically. This example assumes you have accounts set up on Zapier, Gravity Forms, and Salesforce:
Log in to Zapier:
- Open Zapier and log in to your account.
Create a New Zap:
- Click the “+ Click ” button in the Zapier dashboard to create a new Zap.
Set up the Trigger (Gravity Forms):
- Choose “Gravity Forms” as the Trigger App.
- Select the trigger event “New Form Submission.”
Connect Gravity Forms Account:
- Connect your Gravity Forms account to Zapier and choose the specific form you want to use.
Test the Trigger:
- Test the trigger to ensure it pulls sample data from a recent Gravity Forms submission.
Set up the Action (Salesforce):
- Choose “Salesforce” as the Action App.
- Select the action event “Create Lead.”
Connect Salesforce Account:
- Connect your Salesforce account to Zapier.
Map Gravity Forms Fields to Salesforce:
- Map the relevant Gravity Forms fields (e.g., Name, Email, Company) to the corresponding fields in Salesforce.
Test the Action:
- Test the Salesforce action to ensure a lead is created in Salesforce when a new Gravity Forms submission occurs.
Turn On the Zap:
- Once you’ve set up and tested the Gravity Forms trigger and Salesforce action, turn on the Zap to make it live.
Now, Zapier will automatically create a lead in Salesforce with the information provided when a new form submission is received through Gravity Forms. This integration helps streamline your lead generation process by automating form data transfer to your Salesforce CRM.
Shopify Integration (E-commerce)
This integration automates tasks related to online selling, including order processing, inventory management, and customer communication. It helps streamline the entire e-commerce workflow, from purchase to fulfillment. Shopify is a popular e-commerce platform that can be integrated with Zapier to automate order processing, inventory management, and customer communication tasks.
Integration Process
Let’s create a Zap that connects Shopify with Google Ads to automatically add new customers from Shopify to a custom list in Google Ads. This example assumes you have accounts set up on Zapier, Shopify, and Google Ads:
Create a New Zap:
- Click the “+ Click ” button in the Zapier dashboard to create a new Zap.
Set up the Trigger (Shopify):
- Choose “Shopify” as the Trigger App.
- Select the trigger event “New Customer.”
Connect Shopify Account:
- Connect your Shopify account to Zapier and choose the specific store you want to use.
Test the Trigger:
- Test the trigger to ensure it’s pulling in sample data from a recent new customer in Shopify.
Set up the Action (Google Ads):
- Choose “Google Ads” as the Action App.
- Select the action event “Add Contact to Customer List with email.”
Connect Google Ads Account:
- Connect your Google Ads account to Zapier.
Map Shopify Customer Fields to Google Ads:
- Map the relevant Shopify customer fields (e.g., Email, First Name, Last Name) to the corresponding fields in Google Ads.
Choose Custom List in Google Ads:
- Specify the custom list in Google Ads where you want to add the new customer.
Test the Action:
- Test the Google Ads action to ensure that a new customer from Shopify is added to the specified custom list in Google Ads.
Turn On the Zap:
- Once you’ve set up and tested the Shopify trigger and Google Ads action, turn on the Zap to make it live.
Now, Zapier will automatically add a customer to the specified custom list in Google Ads whenever a new customer is added to Shopify. This integration helps ensure that your Google Ads audience is updated with the latest customer information from your Shopify store.
Read Also >>> Zapier Shopify Integration
Mailchimp Integration (Email Marketing)
You can automate email campaigns, list management, and subscriber interactions. It ensures timely and targeted communication with your audience, improving the effectiveness of your email marketing efforts. Mailchimp is a well-known email marketing platform that can be integrated with Zapier to automate email campaigns, manage subscriber lists, and trigger actions based on subscriber behavior.
Integration Process
Let’s create a Zap connecting Facebook Lead Ads with Mailchimp to automatically subscribe new leads from Facebook to a Mailchimp list. This example assumes you have accounts set up on Zapier, Facebook, and Mailchimp:
Create a New Zap:
- Click the “+ Click ” button in the Zapier dashboard to create a new Zap.
Set up the Trigger (Facebook Lead Ads):
- Choose “Facebook Lead Ads” as the Trigger App.
- Select the trigger event “New Lead.”
Connect Facebook Account:
- Connect your Facebook account to Zapier and choose the specific Facebook Page and Lead Form you want to use.
Test the Trigger:
- Test the trigger to ensure it’s pulling in sample data from a recent new lead in Facebook Lead Ads.
Set up the Action (Mailchimp):
- Choose “Mailchimp” as the Action App.
- Select the action event “Add/Update Subscriber.”
Connect Mailchimp Account:
- Connect your Mailchimp account to Zapier and choose the specific list you want to use.
Map Facebook Lead Fields to Mailchimp:
- Map the relevant Facebook Lead Ads fields (e.g., Email, First Name, Last Name) to the corresponding fields in Mailchimp.
Test the Action:
- Test the Mailchimp action to ensure that a new lead from Facebook Lead Ads is added to the specified Mailchimp list.
Turn On the Zap:
- Once you’ve set up and tested the Facebook Lead Ads trigger and Mailchimp action, turn on the Zap to make it live.
Now, whenever a new lead is generated through a Facebook Lead Ad, Zapier will automatically add that lead to the specified Mailchimp list. This integration streamlines capturing leads from Facebook and ensures they are seamlessly added to your Mailchimp audience for further engagement and communication.
Read Also >>> Zapier Mailchimp Integration
Google Drive Integration (File Management)
This integration automates document creation, storage, and sharing tasks. It includes automatically saving email attachments to cloud storage or creating backup copies of files for improved organization and accessibility. Google Drive can be integrated with Zapier to automate file-related tasks, such as saving email attachments to specific folders, creating backup copies, or notifying team members when new files are added.
Integration Process
Let’s create a Zap that connects Zoom with Google Drive to automatically upload new Zoom recordings to a specific folder in Google Drive. This example assumes you have accounts set up on Zapier, Zoom, and Google Drive:
Create a New Zap:
- Click the “+ Click ” button in the Zapier dashboard to create a new Zap.
Set up the Trigger (Zoom):
- Choose “Zoom” as the Trigger App.
- Select the trigger event “New Recording.”
Connect Zoom Account:
- Connect your Zoom account to Zapier and choose the Zoom account and meeting type.
Test the Trigger:
- Test the trigger to ensure it’s pulling in sample data from a recent new recording in Zoom.
Set up the Action (Google Drive):
- Choose “Google Drive” as the Action App.
- Select the action event “Upload File.”
Connect Google Drive Account:
- Connect your Google Drive account to Zapier.
Map Zoom Recording Fields to Google Drive:
- Map the relevant Zoom recording fields (e.g., Recording URL, Meeting Name) to the corresponding fields in Google Drive.
Choose Google Drive Folder:
- Specify the folder in Google Drive where you want to upload the Zoom recording.
Test the Action:
- Test the Google Drive action to ensure a new Zoom recording is uploaded to the specified folder in Google Drive.
Turn On the Zap:
- Once you’ve set up and tested the Zoom trigger and Google Drive action, turn on the Zap to make it live.
Now, whenever a new recording is generated in Zoom, Zapier will automatically upload that recording to the specified folder in Google Drive. This integration simplifies managing Zoom recordings and ensures they are easily accessible and organized within your Google Drive.
Todoist Integration (Productivity)
This integration automates tasks that boost individual and team efficiency. It can involve automating calendar events, creating to-do lists, and integrating communication tools to streamline collaboration. Todoist is a task management app that can be integrated with Zapier to automate the creation of tasks, set reminders, and update task lists based on specified triggers.
Integration Process
Let’s create a Zap that automatically connects Google Calendar with Todoist to add new calendar events as tasks in Todoist. This example assumes you have accounts set up on Zapier, Google Calendar, and Todoist:
Create a New Zap:
- Click the “+ Click ” button in the Zapier dashboard to create a new Zap.
Set up the Trigger (Google Calendar):
- Choose “Google Calendar” as the Trigger App.
- Select the trigger event “New or Updated Event.”
Connect Google Calendar Account:
- Connect your Google Calendar account to Zapier and choose the calendar you want.
Test the Trigger:
- Test the trigger to ensure it’s pulling in sample data from a recent new calendar event in Google Calendar.
Set up the Action (Todoist):
- Choose “Todoist” as the Action App.
- Select the action event “Create Task.”
Connect Todoist Account:
- Connect your Todoist account to Zapier.
Map Google Calendar Event Fields to Todoist:
- Map the relevant Google Calendar event fields (e.g., Event Title, Event Start Time) to the corresponding fields in Todoist.
Test the Action:
- Test the Todoist action to ensure a new task is created when a new calendar event starts in Google Calendar.
Turn On the Zap:
- Once you’ve set up and tested the Google Calendar trigger and Todoist action, turn on the Zap to make it live.
Now, Zapier will automatically create a task in Todoist with the relevant details from the calendar event whenever a new event is created in your Google Calendar. This integration helps streamline your task management by automatically adding events from Google Calendar to your Todoist task list.
Trello Integration (Project Management)
This integration automates project planning, task assignment, and progress tracking. It allows teams to work more cohesively by ensuring everyone is on the same page and tasks are completed on time. Trello is a popular project management tool that can be integrated with Zapier to automate tasks like creating cards, assigning tasks to team members, and updating project boards based on specific events.
Integration process
Let’s create a Zap that connects Google Forms with Trello to automatically create a new Trello card when a new response is submitted in Google Forms. This example assumes you have accounts set up on Zapier, Google Forms, and Trello:
Create a New Zap:
- Click the “+ Click ” button in the Zapier dashboard to create a new Zap.
Set up the Trigger (Google Forms):
- Choose “Google Forms” as the Trigger App.
- Select the trigger event “New Form Response.”
Connect Google Forms Account:
- Connect your Google Forms account to Zapier and choose the form you want to use.
Test the Trigger:
- Test the trigger to ensure it’s pulling in sample data from a recent new response in Google Forms.
Set up the Action (Trello):
- Choose “Trello” as the Action App.
- Select the action event “Create Card.”
Connect Trello Account:
- Connect your Trello account to Zapier.
Map Google Forms Response Fields to Trello:
- Map the relevant Google Forms response fields (e.g., Form Responses, Timestamp) to the corresponding fields in Trello (e.g., Card Name, Description).
Choose Trello Board and List:
- Specify the Trello board and list where you want to create the new card.
Test the Action:
- Test the Trello action to ensure a new card is created when a new response is submitted in Google Forms.
Turn On the Zap:
- Once you’ve set up and tested the Google Forms trigger and Trello action, turn on the Zap to make it live.
Now, whenever a new response is submitted in your Google Form, Zapier will automatically create a new Trello card with the relevant details from the form response. This integration streamlines your workflow by automatically turning form responses into actionable tasks on your Trello board.
Buffer Integration (Social Media)
This integration automates posting schedules, content sharing, and engagement tracking across various social platforms. It simplifies social media management and helps maintain a consistent online presence. Buffer is a social media management platform that can be integrated with Zapier to automate social media posting schedules, share content across multiple platforms, and track social media engagement.
Integration Process
Let’s create a Zap that connects WordPress with Buffer to automatically schedule and share a new WordPress post on your social media channels. This example assumes you have accounts set up on Zapier, WordPress, and Buffer:
Create a New Zap:
- Click the “+ Click ” button in the Zapier dashboard to create a new Zap.
Set up the Trigger (WordPress):
- Choose “WordPress” as the Trigger App.
- Select the trigger event “New Post.”
Connect WordPress Account:
- Connect your WordPress account to Zapier and choose the specific WordPress site you want to use.
Test the Trigger:
- Test the trigger to ensure it’s pulling in sample data from a recent new post in WordPress.
Set up the Action (Buffer):
- Choose “Buffer” as the Action App.
- Select the action event “Add to Buffer.”
Connect Buffer Account:
- Connect your Buffer account to Zapier.
Map WordPress Post Fields to Buffer:
- Map the relevant WordPress post fields (e.g., Post Title, Post URL) to the corresponding fields in Buffer.
Choose Buffer Profile and Schedule:
- Specify the Buffer profile where you want to share the post and set the posting schedule.
Test the Action:
- Test the Buffer action to ensure the new WordPress post is added to your Buffer queue.
Turn On the Zap:
- Once you’ve set up and tested the WordPress trigger and Buffer action, turn on the Zap to make it live.
Now, whenever a new post is published on your WordPress site, Zapier will automatically add that post to your Buffer queue, scheduling it to be shared on your specified social media profiles. This integration helps streamline your social media marketing efforts by automating the process of sharing new WordPress content on your Buffer account.
Slack Integration (Communication)
This integration automates interactions between communication tools, such as syncing messages between platforms or notifying team members of important updates. It enhances overall communication efficiency within an organization. Slack is a widely used team communication tool that can be integrated with Zapier to automate notifications, channel updates, and message sharing between different communication platforms.
Integration Process
Let’s create a Zap that involves Slack. For this example, we’ll set up a Zap that sends a Slack message to a specific channel whenever a new task is added to Todoist. It assumes you have accounts set up on Zapier, Slack, and Todoist:
Create a New Zap:
- Click the “+ Click ” button in the Zapier dashboard to create a new Zap.
Set up the Trigger (Todoist):
- Choose “Todoist” as the Trigger App.
- Select the trigger event “New Task.”
Connect Todoist Account:
- Connect your Todoist account to Zapier and choose the specific project or workspace you want to use.
Test the Trigger:
- Test the trigger to ensure it’s pulling in sample data from a recent new task in Todoist.
Set up the Action (Slack):
- Choose “Slack” as the Action App.
- Select the action event “Send Channel Message.”
Connect Slack Account:
- Connect your Slack account to Zapier and choose the Slack workspace and channel where you want to send the message.
Map Todoist Task Fields to Slack:
- Map the relevant Todoist task fields (e.g., Task Name, Due Date) to the corresponding fields in Slack (e.g., Message Text, Channel).
Test the Action:
- Test the Slack action to ensure a new message is sent to the specified Slack channel when a new task is added to Todoist.
Turn On the Zap:
- Once you’ve set up and tested the Todoist trigger and Slack action, turn on the Zap to make it live.
Now, whenever a new task is added to Todoist, Zapier will automatically send a message to the specified Slack channel, keeping your team informed and ensuring seamless communication between your task management and collaboration tools.
Read Also >>> Zapier Slack Integration
QuickBooks Integration (Finance)
This integration automates financial tasks like expense tracking, invoicing, and budget management. It ensures accurate financial records and reduces the manual effort required for routine financial processes. QuickBooks is a popular accounting software that can be integrated with Zapier to automate financial tasks such as expense tracking, invoice creation, and updating financial records.
Integration Process
Let’s create a Zap that connects Stripe with QuickBooks Online to generate receipts for new payments in Stripe automatically. This example assumes you have accounts set up on Zapier, Stripe, and QuickBooks Online:
Create a New Zap:
- Click the “+ Click ” button in the Zapier dashboard to create a new Zap.
Set up the Trigger (Stripe):
- Choose “Stripe” as the Trigger App.
- Select the trigger event “New Payment.”
Connect Stripe Account:
- Connect your Stripe account to Zapier.
Test the Trigger:
- Test the trigger to ensure it’s pulling in sample data from a recent new payment in Stripe.
Set up the Action (QuickBooks Online):
- Choose “QuickBooks Online” as the Action App.
- Select the action event “Create Sales Receipt.”
Connect QuickBooks Online Account:
- Connect your QuickBooks Online account to Zapier.
Map Stripe Payment Fields to QuickBooks Online:
- Map the relevant Stripe payment fields (e.g., Amount, Payment Date) to the corresponding fields in QuickBooks Online (e.g., Total Amount, Transaction Date).
Choose Customer in QuickBooks Online:
- Specify the customer in QuickBooks Online for whom you want to generate the sales receipt. You should create a customer profile in QuickBooks Online if you still need to do so.
Test the Action:
- Test the QuickBooks Online action to ensure a new sales receipt is generated when a new payment is received in Stripe.
Turn On the Zap:
- Once you’ve set up and tested the Stripe trigger and QuickBooks Online action, turn on the Zap to make it live.
Now, whenever a new payment is received in Stripe, Zapier will automatically generate a sales receipt in QuickBooks Online, streamlining the process of recording transactions and providing accurate receipts for your financial records.
Read Also >>> Zapier Quickbooks Integration