Add/Update Contact LeadConnector from Invitee Created in Calendly
Key Takeaways
- Zapier is an automation tool that acts as the bridge between various applications. With Zapier, you can automate repetitive tasks and free up more time to focus on important matters.
- Calendly makes scheduling meetings easy by letting you share when you’re available and avoiding unnecessary back-and-forth.
- Connecting Calendly with other apps using Zapier and automating tasks based on triggers and actions is easy.
- Learn how to set up Calendly with Zapier from a simple, easy Zap. Yes! You can create a Zap to add or update contacts in LeadConnector from the Invitee created in Calendly.
Automation is the best way to stay ahead when you need to get things done quickly. That is Why we trust Zapier to automate our processes because Zapier makes it easy to connect and organize 7000+ apps. It makes it easy for applications to connect and work together, making a group of speed.
Zapier uses a simple but powerful formula to automate processes, and the formula is: If This, Then That. It sets up triggers and actions from which we create our Zaps that automate our daily routine tasks.
For example, if someone schedules a meeting with you on Calendly (the “if”), then Zapier can automatically add it to your Google Calendar (the “that”).
Let’s use the same formula to create a Zap, which automatically adds/updates contacts in LeadConnector when an invitee is created in Calendly.
Connect Zapier and Calendly to Add/Update Contacts in LeadConnector Automatically
First of all, we will create a Zap by clicking the +Create button.
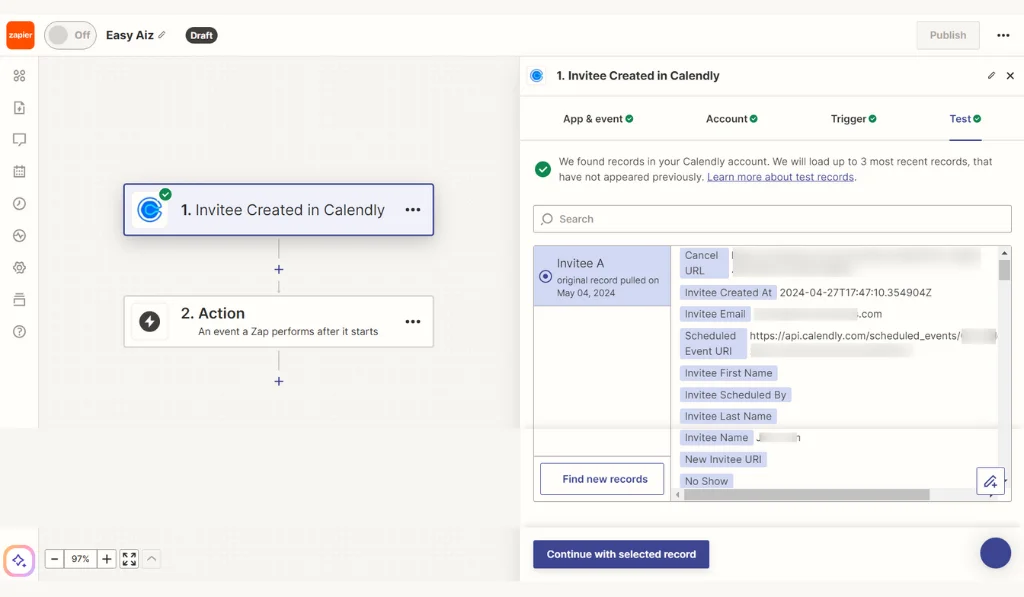
Now it’s time to select Calendly as our trigger app and choose our trigger event. It has only two triggers: one is Invitee Cancelled, and the next one is Invitee Created. We will choose Invitee created as our trigger event.
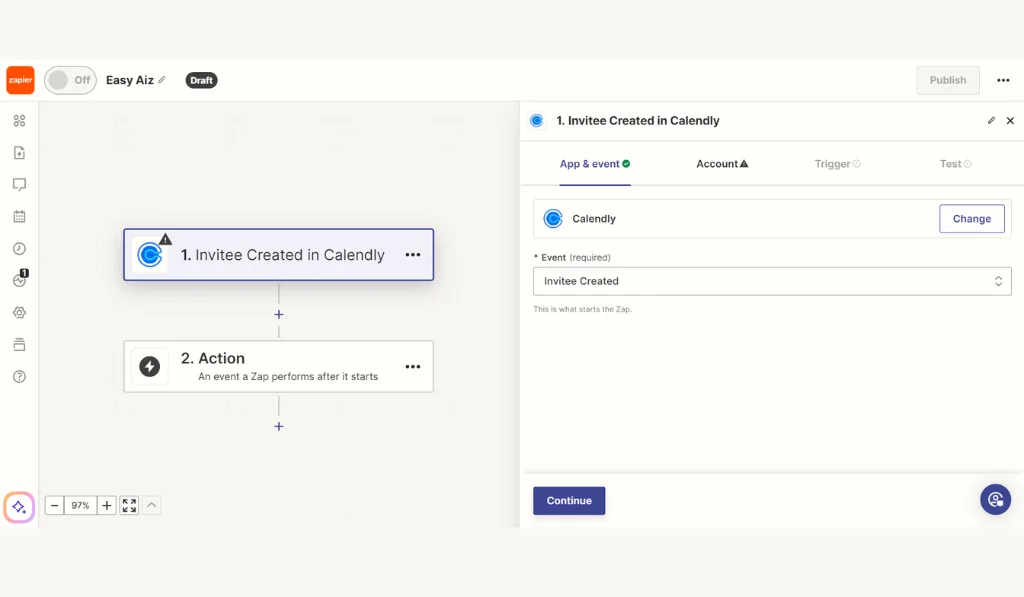
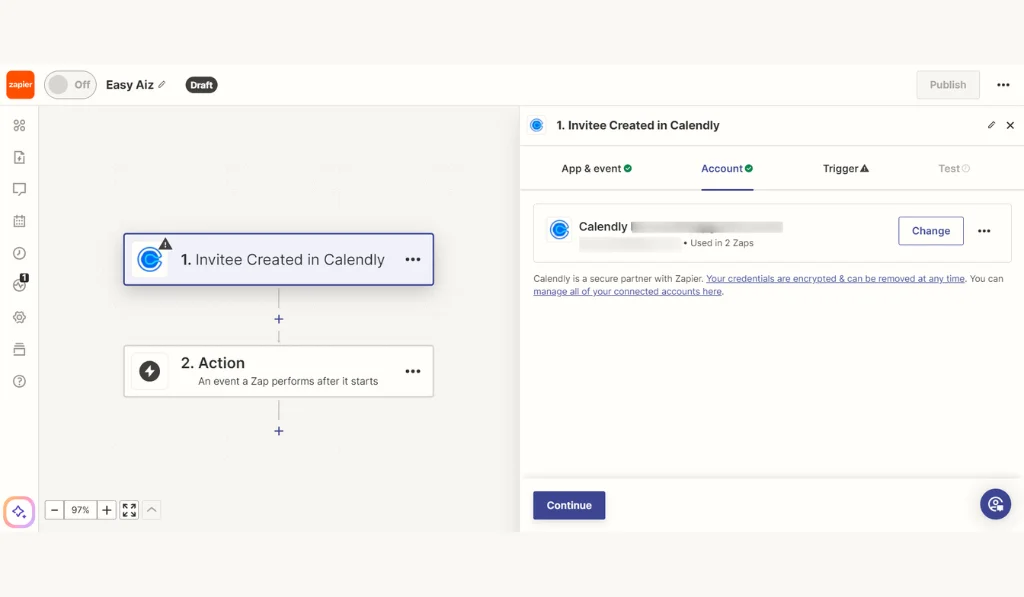
So that whenever a person successfully booked a meeting in Calendly it will trigger the Zap. It’s time to connect the Calendly account to Zapier, and after that, we will move to the next step and define the trigger.
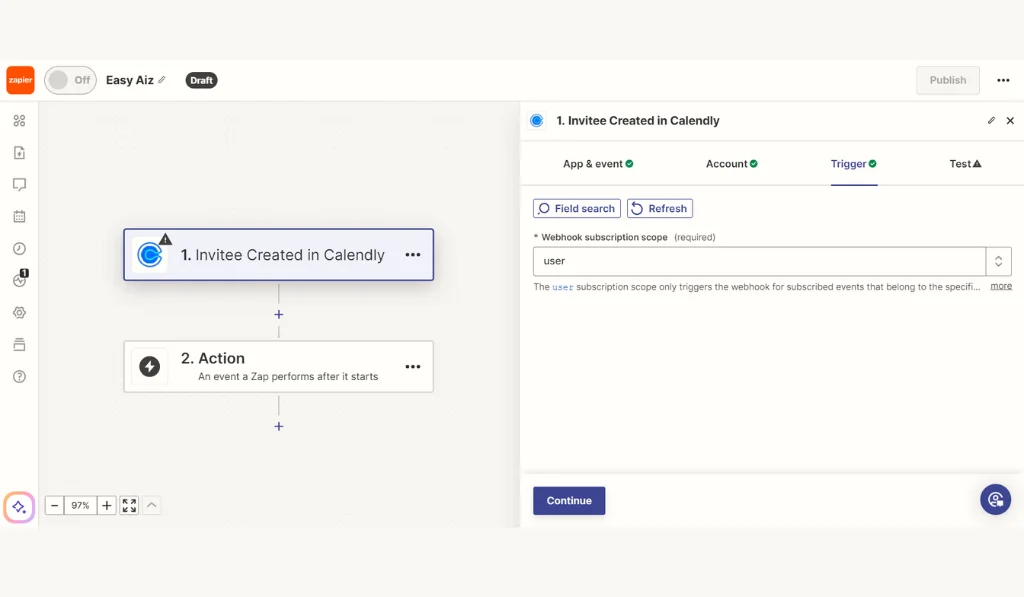
In this step, we will select User instead of Organization because we want the necessary data like name, email, contact, and more of the User who booked the meeting in Calendly.
The user subscription scope only triggers the webhook for subscribed events belonging to the User. The Organization Less subscription scope triggers the webhook for all subscribed events within the Organization. You must be a Calendly organization owner or admin to be able to use the organization’s scope.
Before going to the actions, test the trigger to verify that it is working properly and get the necessary data of the User from the form he filled in from Calendly.
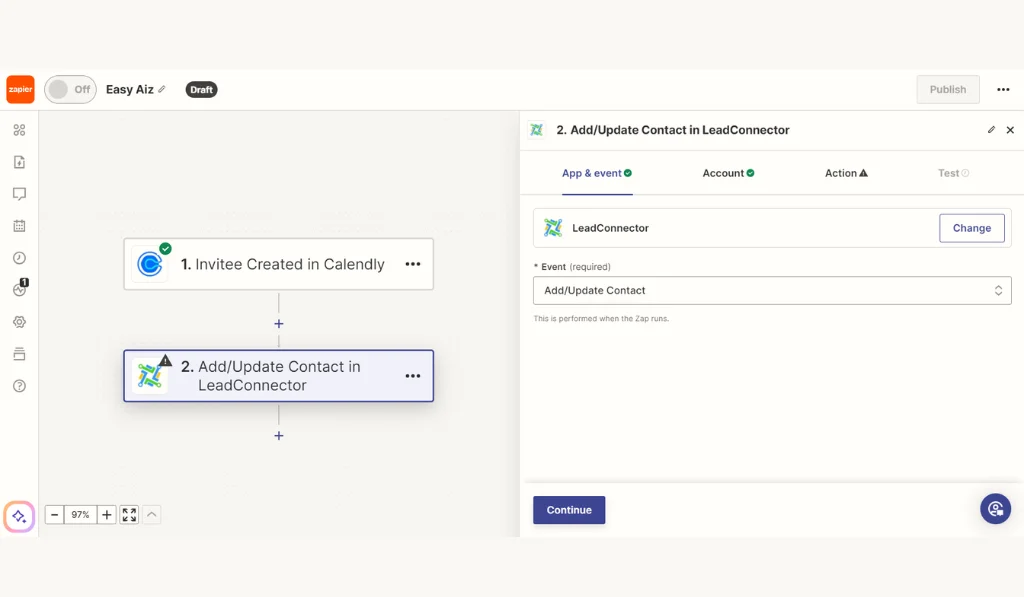
After testing the trigger, we will select LeadConnector as our action app and select Add/Update Contact as our action event to add the contact from the data it receives of the User from Calendly to LeadConnector or create the contact if it doesn’t find the contact.
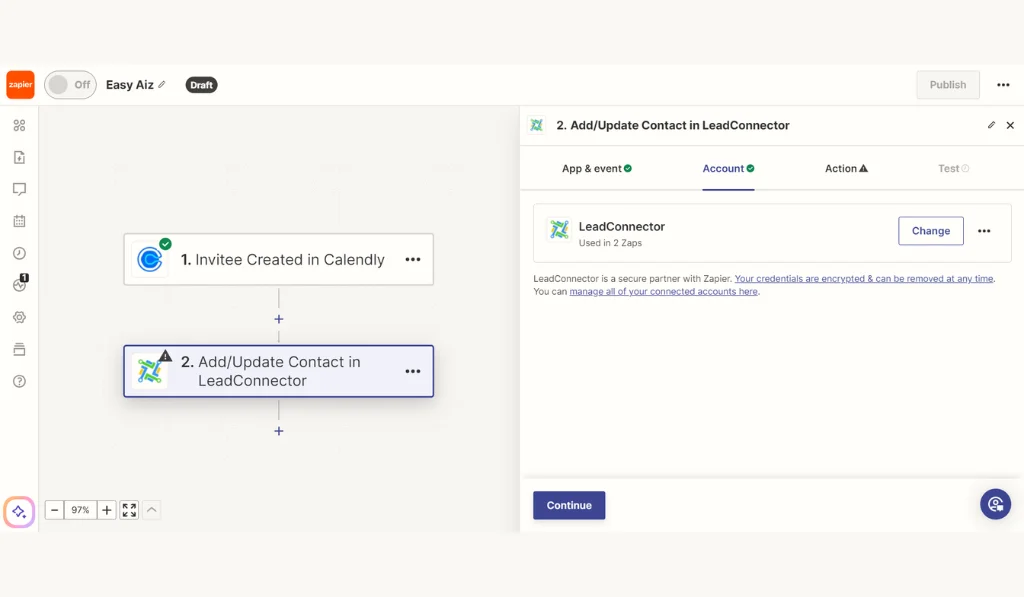
Now connect your LeadConnector account to Zapier and define the fields of the action.
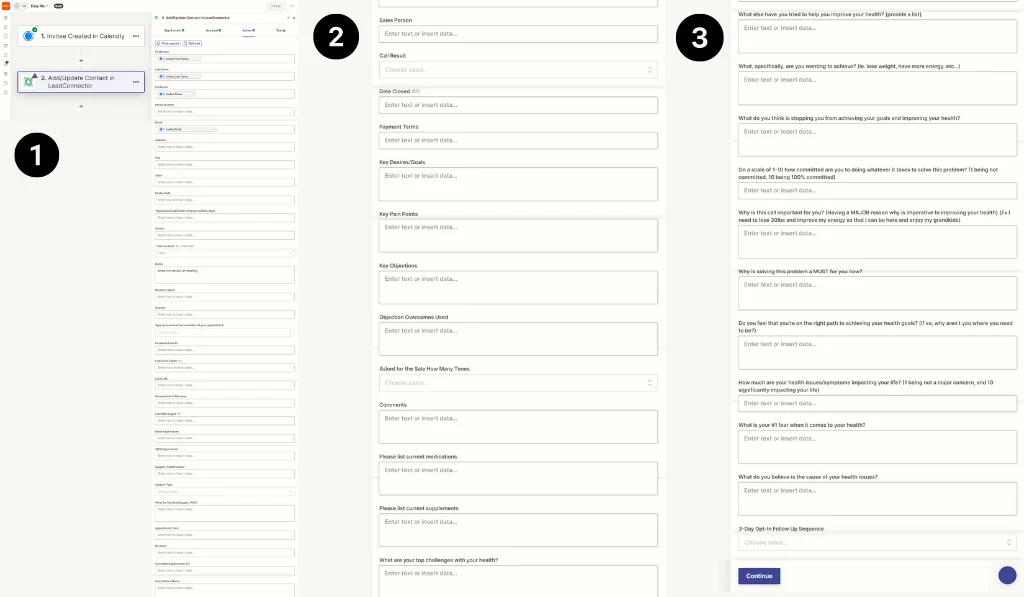
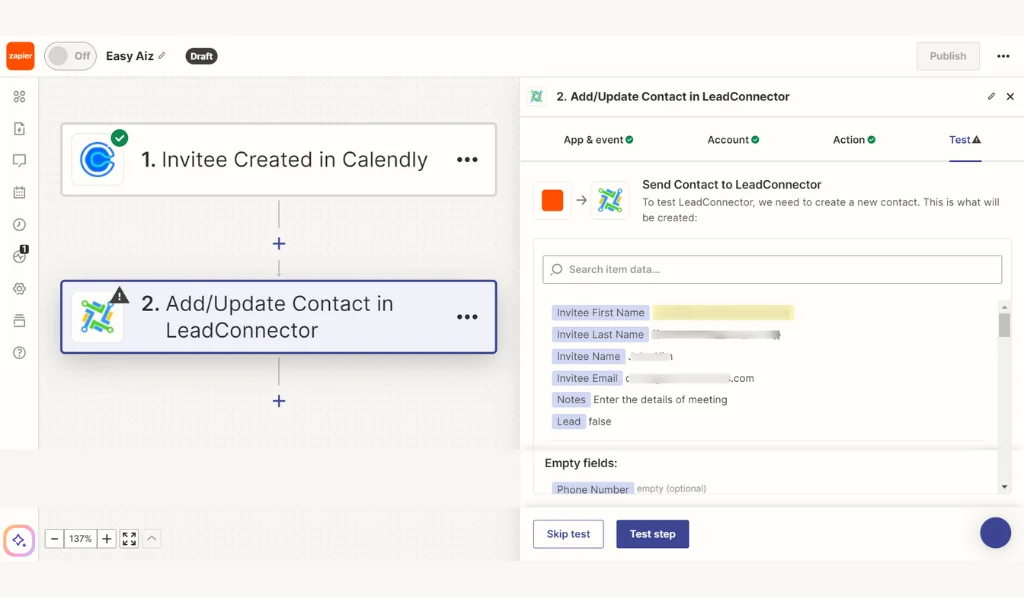
We will define the necessary fields required for the contact such as name, email, and mark as lead. You can even define more per your needs or create more custom fields in GoHighLevel for Contacts.
Test the Zap to ensure it adds the contact in the LeadConnector. If it finds it or not, it creates the contact from the email.
After testing the Zap successfully, publish it, and here is your Zap ready to automate your tasks.
Important Tips for Setting Up Your Zap:
- Always select the trigger event that best suits your workflow. For this scenario, selecting “Invitee Created” in Calendly as the trigger ensures that every new meeting booked triggers the desired action in LeadConnector.
- Before finalizing your Zap, test the trigger to confirm it captures the correct Calendly data. This step is crucial to avoid errors in the workflow.
- Decide whether you need the trigger to respond to events from a specific user or across the organization. This choice affects the data captured by Zapier and, later, the actions it can perform.
- When setting up the action to add or update contacts in LeadConnector, define all the necessary fields. Custom fields can be particularly useful for creating contact information for your business.
- Test your Zap before going live to confirm the Zap is working as intended. It includes checking if the contact is correctly added or updated in LeadConnector with all the right information.
- After your Zap is live, monitor its performance regularly. It will help quickly identify and fix any issues that may arise, ensuring your automation remains effective over time.
Conclusion:
Automation tools like Zapier have brought numerous changes in handling repetitive tasks, closed the gap between various applications like Calendly and LeadConnector, and significantly boosted productivity. By automating the process of adding or updating contacts in LeadConnector, your business can make sure no lead is missed, and every interaction is capitalized upon. The key is setting up your Zaps correctly, testing them thoroughly, and choosing the right triggers and actions based on your requirements. With a properly configured Zap, you’re not just automating a task; you’re setting up a system that works tirelessly in the background and keeps your leads organized and focused on other important tasks.