Table of Contents
How to connect Zapier and Notion to automate your business
Key Takeaways
- Automation is the best way to lose much of a burden. Zapier and Notion are two powerful tools that, when combined, power automation and integration with other apps.
- Meet Notion, which is your helping hand in notes, data, and projects all in one place.
- Zapier serves as a bridge that connects various apps and services, while automation serves in one workspace for notes, tasks, and databases.
- When these two work together, prepare for a business transformation that increases growth and productivity.
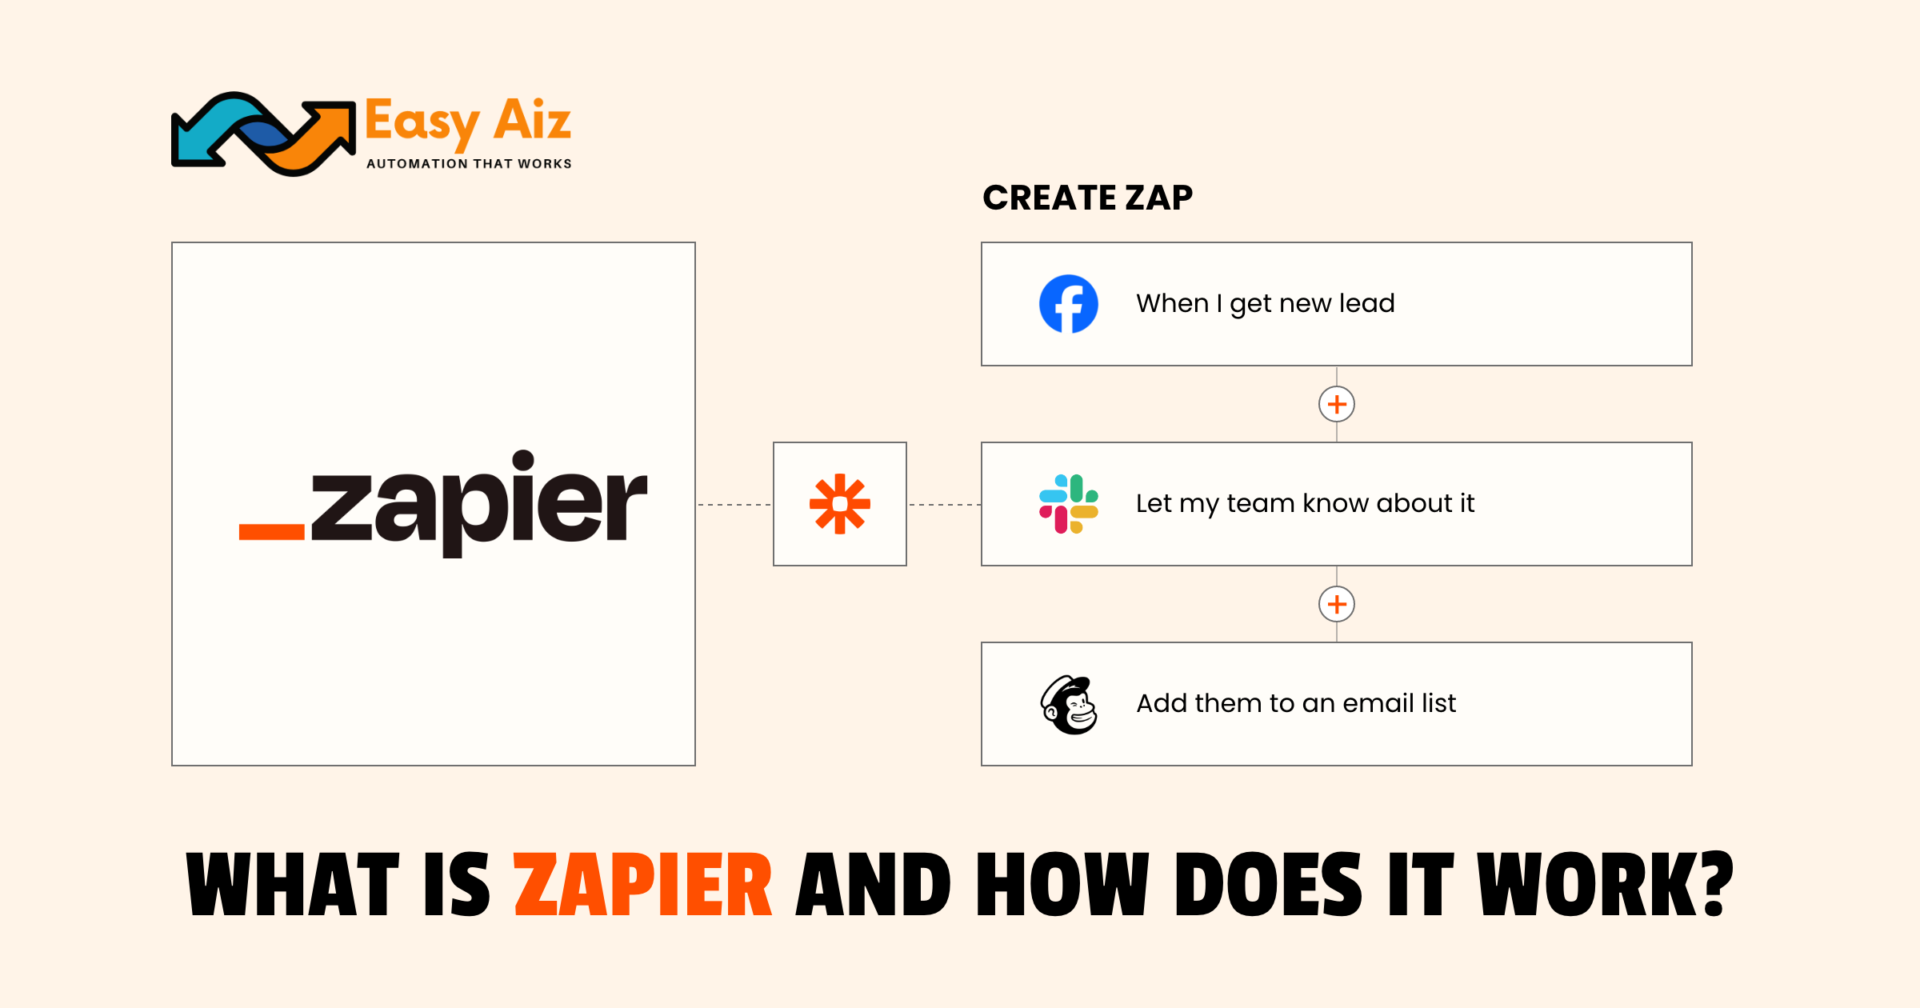
The real power of integrating Zapier and Notion is in creating automated workflows called “Zaps.” You can set Zaps to take different actions, thus saving time and providing more data accuracy. Whatever it is – lead capturing, project management, or notifications – the list is endless.
The integration of Zapier and Notion will take your project management skills to an upper level, helpful in adding efficiency, teamwork, data management, and customized workflows to the working environment. That is a real asset for any business and person.
How the Zapier and Notion Integration Works?
Triggers
New Database Item trigger:
When introduced into the specified database, a new item triggers this event. Whenever new entries are created in a Notion database, it triggers automated tasks within the apps connected through Zapier.
Updated Database Item trigger:
This trigger activates when an existing item within a specified Notion database is modified or updated. It is used to initiate automated actions in other connected apps whenever changes occur to specific items within a Notion database.
Searches
In the context of Zapier and Notion integration:
Find Database Item:
Indeed! Now that you have the permission to go in search of every different item of a Notion database according to certain criteria, every permission is given to use such search parameters such as title, tag, or even other attributes that would identify the item in the database.
Find or Create Database Item:
This search action looks for a particular item within a Notion database. If the item is found, it retrieves it. If the item is not found, it creates a new item in the database based on the provided parameters.
Find Page:
The Search action allows for the retrieval of one particular page in your own Notion workspace. You may search for the page with their titles, tags, or any other given parameter. Once the page is retrieved, you can perform additional operations on it in your Zapier workflow.
Actions
In the context of Zapier and Notion integration:
Create Database Item:
This operation creates a new asset in a specific one Notion Database. You can indicate the content, parameters, even the prop’s title, text, tags or any such.
Update Database Item:
This action enables you to modify or update an existing item within a Notion database. You can specify which item to update and provide the new content or changes you want to make to it.
Create Page:
This allows you to create a brand new page. You can create the title, property, content, and details of the new page right from Zapier.
Custom Actions (Beta):
This can be termed as a custom action by performing according to a specific functionality as per your need. You can perform custom workflows with the interaction of Zapier and Notion along with its own benefits of automation according to a user’s need.
API Request (Beta):
You can also make custom API calls to Notion’s API directly through your Zapier workflow. This feature also gives more flexibility and control over how you would like Zapier to integrate with Notion by directly communicating with Notion’s API endpoints to do actions or retrieve data.
Learn How to connect Zapier to your Notion Workspace?
Check Your Notion Account Permissions:
First, make sure you are the owner of your workspace in Notion. You can do this by going to “Settings & Members” in the left menu and checking the “Members” tab to see if you have admin-level access.
If you are not the owner, then ask the workspace owner to adjust your access level.
Connect Notion to Zapier:
Check Your Notion Account Permissions:
Find Page:
Once you’re the owner, go to Zapier and select Notion as your app. Choose the trigger, search, or action you want Notion to perform. Then Click Continue.
Now, click on “+Connect a new account” and give access to your workspace by selecting the pages, you want Zapier to access.
Once you allow access, your Notion account will be connected to Zapier.
Confirm Connection:
Upon linking your account, you will find Zapier among the various connection options within the Notion settings under the “My Connections” tab.
Therefore, you have connected your Notion account to Zapier, and you can begin using it to automate tasks for Notion with other applications.
Now, Create your Zap with Notion:
Here’s a simple step-by-step integration process between Zapier and Notion:
Create a Zap: In Zapier, click the “+create” button and click on “Zaps” to start creating a new integration.
Choose Trigger App and Event: Select “Notion” as the trigger app. Choose “New Database Item” as the trigger event. Because whenever a new item is added to a specified Notion database, it will trigger the integration.
Connect Notion Account: If you didn’t select your Notion account to Zapier before, connect it, and if you did select your Notion account to Zapier, you will see your Notion account connected to Zapier.
Select Notion Database: Choose the specific Notion database you want to monitor for new items.
Test Trigger: Test the trigger to ensure Zapier is retrieving data from your Notion database correctly.
Choose Action App: Select “Google Calendar” as the action app.
Select Action Event: Choose “Create Detailed Event” as the action event. When a new item is added to the specified Notion database, Zapier will create an event in Google Calendar.
Connect Google Calendar Account: Connect your Google Calendar account for the action step.
Map Fields: Map the fields from the trigger (new database item) to the action (creating an event in Google Calendar). Specify which data from the new item in Notion should be used to create the event.
Customize Event: Based on the data available from the new database item in Notion, customize the event details as needed in Google Calendar, such as title, date, description, etc.
Test Action: Test the action to ensure Zapier can create the event in Google Calendar correctly.
Once you want to finalize the setup, switch on the Zap to kick off the integration. Also, monitor the integration to see if indeed it’s working properly. You can also be notified for any errors or issues that might occur.
Now, every time an item is added to the Notion database you chose, automatically, a new event would be created in Google Calendar using the data provided.
Common problems with Notion on Zapier
How do you work with dates in Notion?
Notion has ISO 8601 date format; in which you will get:
- Year
- Month
- Date
Optionally, it includes:
- Time
- Timezone offset
When interacting with Notion dates through Zapier, it’s important to ensure that the dates are formatted correctly. If you’re including time and Timezone information, it’s recommended to use a tool like Formatter to adjust the format as needed.
How Zapier setting can affect dates?
If you still need to set your timezone in Zapier, it will automatically set all dates in UTC time. If your Notion account is set to a different timezone, this can lead to discrepancies.
To avoid confusion and ensure accurate date handling, it’s suggested that you set the timezone in Zapier to match the timezone set up in your Notion account.
Search for a database item by a date field
Based on your Zapier account settings, Zapier might expect extra time and timezone information connected with the date when you use Zapier to search for database items by date.
To ensure accurate searches, it may be necessary to include a specific time format (T00:00-0000) alongside the date to override Zapier’s default time and timezone settings.
My databases are not listed in the dropdown menu
If you’re having trouble finding your database in Zapier, check that Zapier has permission to access your database in Notion.
If the database is nested within other pages, un-nest it and temporarily make it a page to help Zapier find it.
Create a new app account connection to Notion within Zapier also to resolve the issue.
Getting an error about an invalid option at the time of creating a database item
This error occurs when you try to add options to a “Select” or “Multi-select” property type column in a Notion database.
To resolve this problem, make sure that the options added match those already in the Notion database. All other choices need to be added inside of Notion first.
I cannot see all fields in my Zap
Not all property types in Notion databases are supported by Zapier. Unsupported types include:
- Files and media
- Formulas
- Relations
- Rollups
- Status
These property types will not appear in your Zap’s triggers or actions.
My Zap is over-triggering
If your Zap is triggering too frequently, you can add filters to set a certain condition under which the Zap should run. This prevents the Zap from running on every change made to your database, ensuring it only performs actions on those items you want.
I am Missing Content in my Zap
When using triggers or actions related to database items in Zapier, it’s normal for the Zaps not to display data from content blocks within Notion.
Zap Doesn’t Trigger on Updates
Zaps triggered by the “New Database Item” trigger won’t activate if updates are made to existing content blocks within Notion.
Unexpected Error
The error “!DOCTYPE html” indicates a temporary issue with communication between Zapier and Notion’s servers.
Waiting for a few minutes or replaying failed Zap runs may resolve this issue.
New Pages Not Appearing
If new pages don’t show up in your Zaps after connecting your Notion Account, you will need to grant Zapier permission in your Notion account for those specific pages. This is because Notion’s API requires your explicit permission for each page that Zapier can access.
Conclusion
Integrating Zapier with Notion gives simple automation using “Zaps.” Triggers like “New Database Item” and actions like creating or updating database items can help you automate tasks and increase productivity.
To set up the integration, make sure you have the right Notion permissions, connect your accounts, and then create Zaps by choosing trigger events and actions. Be aware of potential issues such as date format compatibility and permissions for new pages.
Despite challenges, the combination of Zapier and Notion enables effective workflow management and communication, from which you can increase your business growth and efficiency.
Table of Contents
Get started with Easy Aiz
Have any project in mind? Book a free call now to automate your Project !!
More Blogs
Discover a complete yet unbiased comparison of Zapier vs Make. Dig deep into their features, pricing, integrations and much more.
Explore top 11 closest Zapier competitors- each offering a unique set of features and facilities.
How to Set Up Zapier Integration with Mad Mimi and Outgrow Zohaib Ali10/07/2025 Table of …
Explore some of the best email marketing softwares in 2025 along with their key features, pros, cons and pricing plans.