Table of Contents
Automation is making its way into almost every niche in today’s world, with Zapier being one of its prominent examples. No matter if you are a content creator, an e-commerce storeowner or a digital marketer, Zapier helps to ease the tasks.
From automating workflows to helping you schedule blog posts , Zapier WordPress integration opens up endless possibilities for growth and productivity. However, knowing how to integrate is crucial.
So, keep on reading, and in the forthcoming content, we will discuss a simple step-by-step guide for you to get started, along with all the other essential information.
Let’s begin.
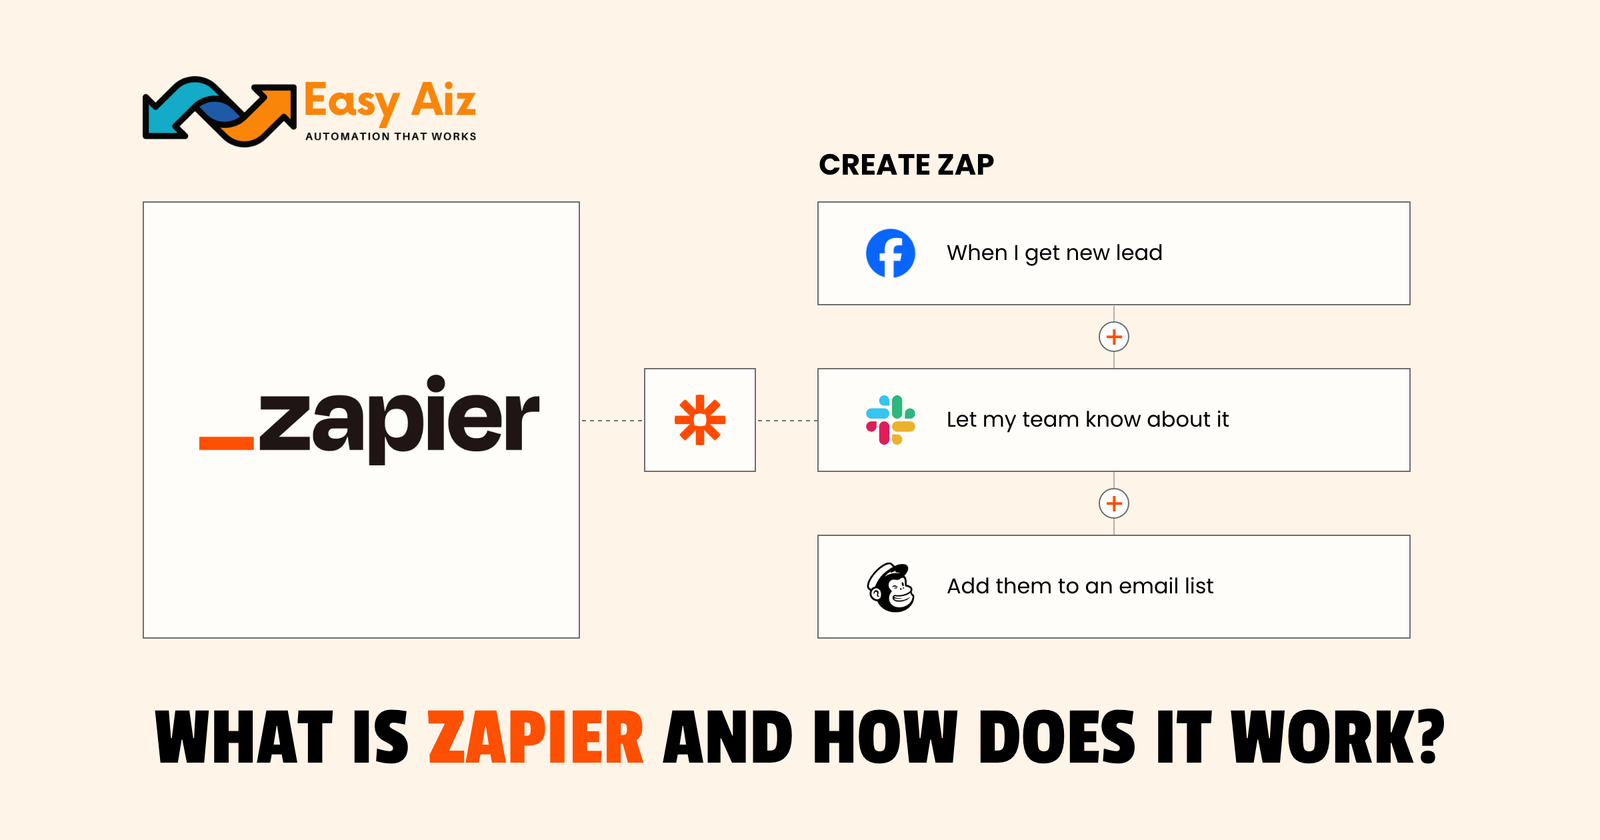
6 Steps: Integrate Zapier with WordPress
Integrating WordPress with Zapier is a simple process to get done with. Here is a step-by-step guide you can follow to get done with the task in a few minutes.
Step 1: Create a User for Zapier
Creating a user for Zapier enhances the security of your site and connects accounts. Simply long into your WordPress website using the admin credentials and navigate to Users.
Now Click on: “Add New”. Enter the Zapier on the “ Add User” page and put in the account username. Lastly, click on the “ Add New User” button to complete the step.
Step 2: Choose a Zap
Step 3: Connect WordPress to Zapier
Now that we are done with the initial steps, it is time to finally connect the WordPress account with Zapier. To do so, click on the “Sign in to WordPress” button. Wait for a second or two, and then enter the URL of your website along with the username you have created in Step One.
Next, provide a pre-set password and select Yes Continue. The site will redirect you to the Zap Setup screen. Here, click on “Continue” to move forward in the process.
Step 4: Customize Your Trigger Event
Now, it’s time to adjust your trigger settings. Zapier will show which fields are required. You can choose which post status will activate the Zap. For example, you may pick published posts only. Next, you can also select a post type.
Let’s say you want to track only podcast drafts. So, simply choose that option from the drop-down list. After that, you can test your settings. You’ll see three testing options available.
However, we suggest clicking the Test & Review button first.
This pulls information from your WordPress site. You’ll stay on the same screen to view the test results. Then, you can continue with the setup steps.
Step 5: Create an Action
At this point, you have to choose the app which will perform an action after the trigger.
For our example, you might select Google Sheets. You’ll follow steps like before but with this second app. This time, it’s Google Sheets instead of WordPress. From the drop-down menu, select Create Spreadsheet Row.
Then, connect your Google account to Zapier. Click Sign in to Google Sheets to begin. Choose your Google account and give Zapier access. Next, select the spreadsheet you want to use. Pick the worksheet where new rows should appear.
More fields will show up based on your sheet. Now you can match WordPress post info to spreadsheet columns. Customize each field as needed for your setup. After that, click to Test Your Zap.
If everything is looking good to you, complete the setup. To do so, look for an option which says “Turn on Zap”. You can also click Back to Setup to make changes. Later, you can edit your Zap from your dashboard.
Step 6: Test Your New Action
Finally, test your work and see if everything is working fine. Create a new draft post in WordPress. Then, check your spreadsheet for a new row. If a row appears, your Zap is working fine.
You can also visit your Zapier dashboard anytime. There, you can view the status of your Zaps. You may also edit or manually run any Zap.
It gives you full control over your automations.The dashboard lets you manage connected apps easily. You can also create new Zaps whenever needed.
Benefits of Integrating Zapier with WordPress
You can include an extensive list of benefits through Zapier WordPress integration including the following:
- Doing the same tasks for days and weeks can be overwhelming. However, Zapier Automates repetitive tasks like posting to social media to help you take a breath of fresh air.
- Connects WordPress with over 5,000 apps seamlessly to help you work in a more organized manner.
- Requires no coding or technical skills to set up. Hence, you don’t have to be a coder or acquire technical knowledge for its operations.
- Sends instant alerts for new posts or form submissions.
- Helps manage leads by syncing with email tools and CRMs.
- Saves time and reduces human error in daily workflows. As a result, work productivity is automatically increased.
Conclusion
Table of Contents
Get started with Easy Aiz
Have any project in mind? Book a free call now to automate your Project !!
More Blogs
Discover a complete yet unbiased comparison of Zapier vs Make. Dig deep into their features, pricing, integrations and much more.
Explore top 11 closest Zapier competitors- each offering a unique set of features and facilities.
How to Set Up Zapier Integration with Mad Mimi and Outgrow Zohaib Ali 10/07/2025 Table …
Explore some of the best email marketing softwares in 2025 along with their key features, pros, cons and pricing plans.